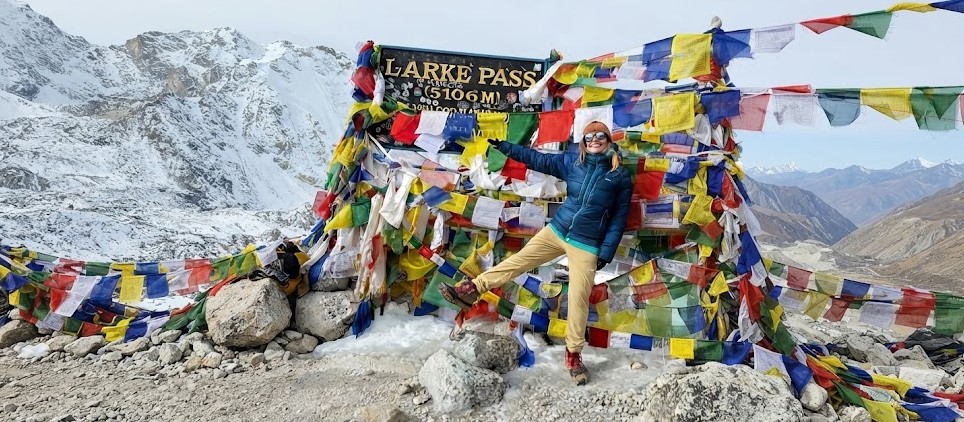
I have led enough Japanese trekkers up the Budhi Gandaki valley now to know the pattern before it happens. Most arrive at Soti Khola already fitter than half the other nationalities on the trail, because they have spent weekends on Mount Fuji or in the Japanese Alps and they know what a long uphill day feels like in the legs. Then somewhere around Samdo or the Larke La approach, the altitude reminds them that no peak in Japan gets anywhere near 5100 meters, and fitness alone stops being enough. This article is written for that exact situation: a capable hiker from Tokyo, Osaka, or anywhere else in Japan who wants an honest, detailed answer on what the Manaslu Circuit Trek actually involves, from visas and flights to the altitude gap that catches even strong hikers off guard.
Why the Manaslu Circuit Trek Appeals to Trekkers from Japan
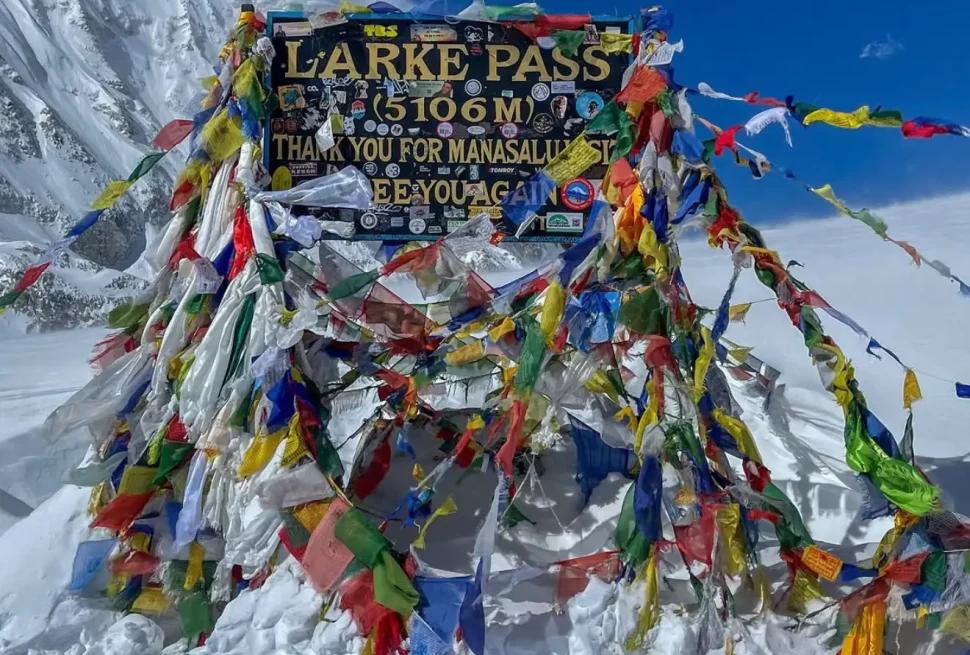
Japan has one of the strongest domestic hiking cultures in Asia. Peak baggers who have done the Hyakumeizan, the hundred famous mountains list, or who trek the Kita Alps and Minami Alps every summer already understand multi day trekking logistics: layered clothing, hut culture, early starts, weather windows. That background matters on Manaslu because this is not a paved tourist trail. It is a genuine wilderness circuit around the eighth highest mountain on earth, following the Budhi Gandaki river gorge up through Gurung and Tibetan influenced villages before crossing the Larke La pass at roughly 5106 meters. Trekkers who have handled Fuji’s volcanic scree or a wet week in the Japanese Alps tend to adapt faster to teahouse life than first time hikers from flatter countries. The route itself is covered in detail on the day by day route breakdown, which is worth reading before you commit to dates, because the trail changes character dramatically between the lower gorge and the high alpine section near Samdo and Dharamsala.
What consistently surprises Japanese clients is how remote this particular circuit still feels compared to Everest or Annapurna. There is no road all the way to the trailhead the way there increasingly is on other routes, phone signal disappears for days at a stretch, and the villages are smaller and more traditional. If you want a trek that feels like an expedition rather than a busy tourist corridor, this is one of the last places in Nepal that still delivers that.
Visa Requirements for Japanese Passport Holders
Japanese citizens do not need to arrange a visa before flying to Nepal. Nepal issues visa on arrival to most nationalities, Japan included, at Tribhuvan International Airport in Kathmandu. As of the current fee structure, a fifteen day tourist visa costs 30 US dollars, a thirty day visa costs 50 US dollars, and a ninety day visa costs 125 US dollars. All three are multiple entry visas, which is useful if you plan a side trip to Pokhara by air and back, or if you are combining Manaslu with a short visit to another country in the region.
You will need a passport valid for at least six months beyond your entry date, one passport sized photo with a plain white background, and the visa fee itself. Card payment machines are usually available at the arrival hall, but they are not always reliable, so bring US dollars in cash as a backup. Nepal also runs an online Electronic Travel Authorisation system that lets you fill out the arrival form and pay in advance by card, which speeds up the immigration queue considerably since Kathmandu airport can get crowded during peak trekking season mornings. I would recommend filling this out from Japan a few days before departure rather than doing the paper form on arrival, purely to save yourself twenty minutes of queueing after a long flight.
Since a Manaslu Circuit trek including approach and return days typically runs fourteen to eighteen days once you include Kathmandu buffer days, most Japanese trekkers should book the thirty day visa rather than the fifteen day option. It costs twenty dollars more but removes any risk of an extension hassle if your itinerary slips due to weather on the pass, which does happen.
Flight Routes and Journey Time from Tokyo and Osaka
Nepal Airlines operates the only nonstop service between Japan and Kathmandu, flying Narita to Kathmandu around four times a week using an Airbus A330, with a flight time of roughly seven hours and forty five minutes. This is genuinely the fastest way to get there and it removes a full transit day compared to routing through a third country. The catch is that schedules on this route can be irregular and seat availability in high season books out early, so if you want the direct flight, book it as soon as your dates are fixed rather than waiting.
If the direct flight does not line up with your dates, or you are flying out of Osaka rather than Tokyo, the practical alternative is a one stop connection through a regional hub. The most common routings Japanese trekkers use are via Bangkok on Thai Airways, via Kuala Lumpur on Malaysia Airlines, via Guangzhou or Chengdu on Chinese carriers, or via Delhi on Air India. All of these add a layover of anywhere from two to six hours, and total door to door travel time typically runs somewhere between nine and fourteen hours depending on the connection. Delhi routings are often the cheapest but immigration and security at Delhi airport can eat into a short layover, so build in a comfortable connection window if you go that way, ideally three hours minimum.
One point worth flagging for anyone booking their own flights: because the trek starts from a drive out of Kathmandu rather than a domestic flight to a mountain airstrip, you do not need to worry about the fog related cancellations that plague the Everest region’s Lukla flights. Your main scheduling risk is simply the international leg into Kathmandu itself, so I would build at least one full spare day into your Kathmandu arrival before the trek begins, both to recover from the flight and to absorb any minor delay without losing trekking days.
Time Zone Difference Between Japan and Nepal
Japan sits at UTC plus 9. Nepal uses the unusual UTC plus 5:45 offset, one of only a couple of countries in the world running on a quarter hour offset rather than a full or half hour one. That puts Japan exactly three hours and fifteen minutes ahead of Nepal, year round. Neither country observes daylight saving time, so this gap never shifts with the seasons, unlike time differences with Europe or North America that change twice a year.
In practical terms, if it is noon in Tokyo or Osaka, it is 8:45am in Kathmandu. This is a mild jet lag adjustment compared to flying to Europe or the Americas, and most trekkers find they adjust within a day or two. It also means there is a comfortable overlap window for calling home in the evening Nepal time, which lines up with late evening in Japan, useful if you want to check in with family before heading up valley into areas with no signal at all.
Best Time of Year to Book and Travel
The Manaslu Circuit has two reliable trekking windows: autumn from September through November, and spring from March through May. Autumn, especially October, tends to bring the most stable weather with clear mountain views and dry trails, and it is also the busiest booking period, so if you are targeting October you should lock in permits and flights at least two to three months ahead. Spring is the other strong option, with rhododendron blooms lower down the valley and longer daylight hours, though afternoon cloud build up is a bit more common than in autumn.
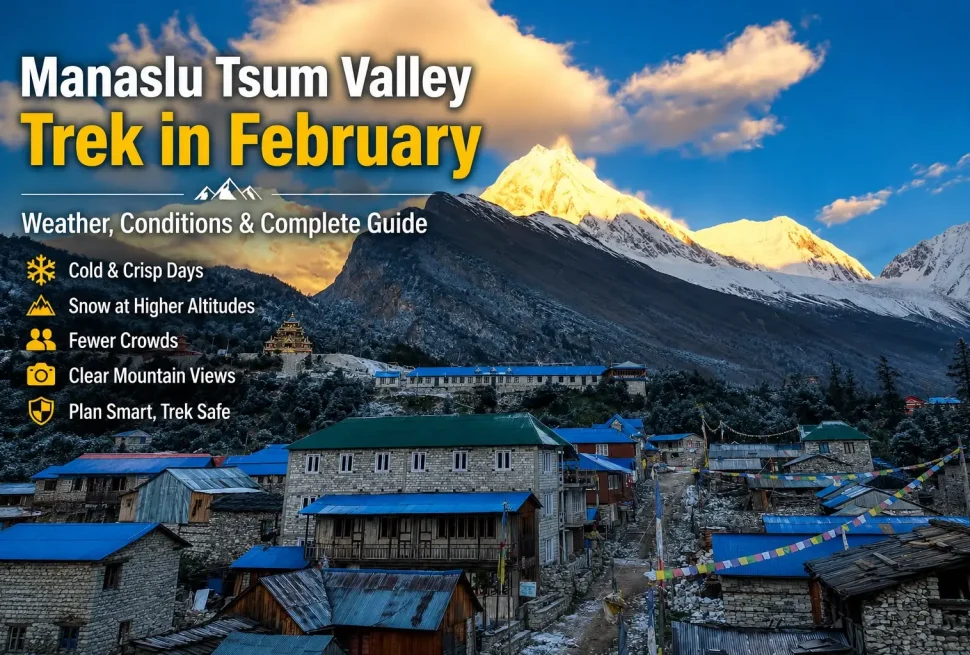
Winter, December through February, is technically possible on the lower part of the route but the Larke La pass can close entirely after heavy snowfall, and teahouses above Samdo sometimes shut down for the season, so I do not recommend it for a first attempt. The summer monsoon months of June through August bring heavy rain, leech infested lower trails, and a much higher risk of landslide related road closures on the drive to the trailhead, so most operators, ours included, steer clients away from that window for Manaslu specifically.
For Japanese trekkers planning around Golden Week or the Obon holiday period, be aware that Golden Week in early May sits right in the tail end of the good spring window, which works reasonably well, while Obon in mid August falls squarely in monsoon season and is not a good match for this trek. If your annual leave is more flexible, aiming for the second half of October or the first half of November from Japan gives you the best combination of trail conditions and value, since flights and permits during the absolute peak weeks of late September and early October carry a premium.
How Japanese Mountain Hiking Experience Translates to Himalayan Altitude
This is the section I want Japanese trekkers to read most carefully, because it is where I have seen strong, experienced hikers underestimate the trek. Mount Fuji tops out at 3776 meters. The highest peaks in the Japanese Alps, places like Okuhotaka and Yari, sit around 3000 to 3190 meters. These are serious mountains and climbing them regularly builds real fitness and real judgment about weather and pacing. But the Larke La pass on the Manaslu Circuit sits at approximately 5106 meters, and you will sleep at altitudes above 3500 meters for several consecutive nights before you even reach it. There is simply no equivalent altitude exposure available inside Japan, and fitness built on Japanese peaks does not translate directly into altitude tolerance.
Altitude sickness is not primarily a fitness problem, it is an acclimatization problem, and it does not respect how many marathons you have run or how fast you summit Fuji. I have watched very fit, disciplined Japanese trekkers get hit by mild altitude symptoms around Samagaon or Samdo simply because they pushed the ascent rate too fast, the same mistake I have seen from every nationality. The fix is straightforward and well understood: build in acclimatization days, particularly around Samagaon before pushing higher, drink far more water than feels natural, and treat any headache or nausea as a signal to stop ascending rather than push through it. Our detailed difficulty assessment breaks down the day by day elevation gain and the specific sections where altitude risk climbs fastest, and I would genuinely recommend reading it even if you consider yourself an experienced hiker, because the numbers on this trek are simply on a different scale than anything most Japanese trekkers have done before.
The honest advice I give every Japanese client before departure is this: your hiking fitness from Japan is a real asset, it means you will not struggle with the daily walking hours or the terrain underfoot, but it buys you nothing against altitude. Respect the acclimatization schedule your guide sets, even on days when you feel strong enough to go faster.
Money Matters, Currency, Cash and Cards
The Nepali rupee is the local currency, and Japanese yen is not something you can easily use on the trail, though it can occasionally be exchanged at licensed money changers in Kathmandu’s Thamel district, usually at a worse rate than US dollars or euros. If you are bringing cash from Japan specifically for this trip, converting yen to US dollars before you leave, or exchanging on arrival in Kathmandu, tends to get you a better rate than trying to exchange yen directly for rupees in smaller towns.
ATMs are widely available in Kathmandu and in Pokhara if your itinerary passes through there, and most accept international cards including Visa and Mastercard, though withdrawal limits per transaction are common and fees add up. Once you leave the road head and start walking up the Budhi Gandaki valley, there are no ATMs at all until you return. Teahouses, local shops, and any incidental purchases such as extra snacks, hot showers, phone charging, or wifi access along the trail are cash only, and prices in rupees rise noticeably the higher and more remote the village, simply because everything has to be carried in by porter or mule. Budget generously for cash on the trail itself, since running short with no way to withdraw more is a genuinely inconvenient problem two weeks into a remote trek.
Card payment for the overall trip package, flights, and larger prepaid arrangements is normal and can usually be handled before you leave Japan or on arrival in Kathmandu. For the trail portion, plan on carrying enough rupees in cash to cover incidentals for the full trekking duration plus a buffer.
Travel Insurance, Why Standard Japanese Policies Often Fall Short
This is one of the most important practical points in this entire article, and it is the one I see catch Japanese trekkers off guard most often. Many standard travel insurance policies sold in Japan, including the credit card travel insurance that comes bundled with premium cards, and many of the basic policies sold at the airport counter, either exclude high altitude trekking entirely or cap emergency medical and rescue coverage at an altitude well below what the Manaslu Circuit requires. Some policies quietly draw the line around 3000 or 3500 meters, which sounds generous until you realize you will sleep well above that ceiling for multiple nights on this trek and cross a pass at over 5000 meters.
The coverage that actually matters here is helicopter evacuation. If altitude sickness or an injury requires a rescue from somewhere like Samdo or Dharamsala, that helicopter flight is expensive, and rescue services in this region generally want confirmation of adequate insurance, or a guarantee of payment, before they will fly. A policy that does not explicitly cover emergency helicopter evacuation from high altitude trekking, typically requiring coverage up to at least 6000 meters for a trek like this one, is not adequate for the Manaslu Circuit regardless of what its brochure says about mountain activities in general.
Before you book, contact your insurer directly, ideally in writing, and confirm three things specifically: that trekking above 5000 meters is covered, that emergency helicopter evacuation is included and at what altitude ceiling, and what documentation or emergency contact process is required to activate a rescue. Specialist adventure travel insurers that explicitly list high altitude trekking as a covered activity are usually a safer bet than general purpose travel policies, even ones marketed as comprehensive. This is not a place to assume a policy is fine just because it sounds thorough.
Permits and Group Requirements for the Manaslu Circuit
The Manaslu Circuit passes through a restricted area, which means it requires a Restricted Area Permit, generally called RAP, in addition to conservation area permits. These permits cannot be applied for independently, they must be arranged through a registered trekking agency, and a licensed guide is legally mandatory for the restricted section of the route. This is different from more open regions like Annapurna Base Camp where independent trekking without a guide is more common.
Current RAP pricing is season dependent. During the peak autumn season of September through November, the fee runs around 100 US dollars per person for the first seven days, with an additional per day charge for each day beyond that. During the rest of the year the rate is somewhat lower. On top of the RAP you will also need the Manaslu Conservation Area Permit and the Annapurna Conservation Area Permit, since the circuit crosses from one conservation area into the other near the pass, each priced in Nepali rupees for foreign nationals.
An important rule for solo travelers to know: as of March 2026 Nepal removed the old requirement for a minimum of two trekkers on the restricted area permit application, so a genuinely solo trekker can now apply individually. A licensed guide remains mandatory regardless of group size, which fits how this restricted region is run in any case, so travelling alone from Japan is now considerably simpler to arrange than it used to be. Full current permit costs and a broader cost breakdown for the whole trip, food, lodging and staff included, are laid out on our frequently asked questions and cost overview, which is worth checking against whatever quote you receive since permit fees and rules on this route do get revised from year to year.
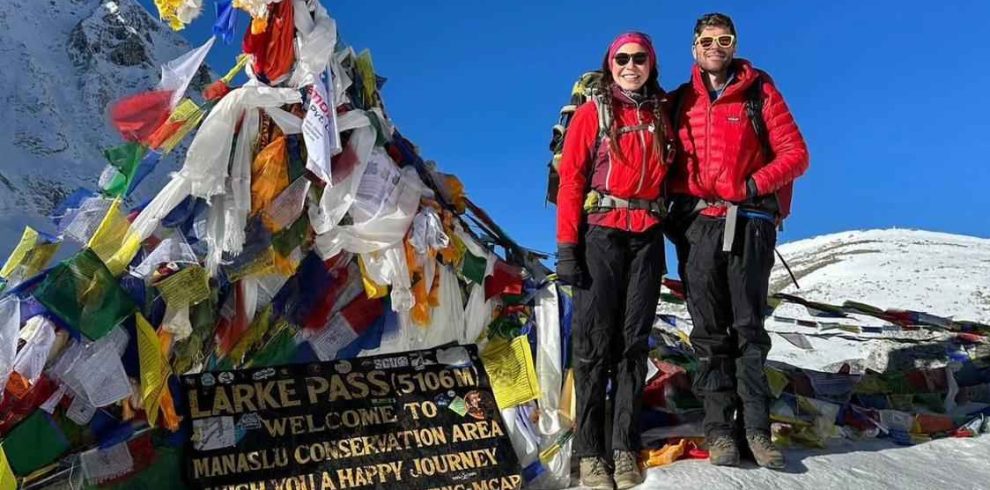
The Manaslu trek for couple is a private and peaceful Himalayan trekking experience, ideal for couples who want adventure, comfort,…
Language and Communication on the Trail
English proficiency among licensed Nepali trekking guides on this route is generally good, particularly among guides experienced with international groups, since English is the working language of the Nepali trekking industry and licensing exams include an English component. That said, the level of fluency varies, and technical or nuanced medical conversations, for instance describing altitude symptoms in detail, are sometimes easier with simple, direct English rather than idiomatic phrasing.
Japanese speaking guides do exist in Nepal but they are genuinely uncommon, and demand for them usually outstrips supply during peak season, so do not assume one will be available on short notice. If having a Japanese speaking guide is important to you, raise it as early as possible when planning your trip so an agency has time to check availability, rather than assuming it can be arranged a few weeks out.
My practical advice for Japanese trekkers without confident English is to prepare a short list of key trekking and medical vocabulary before you go, things like headache, nausea, dizziness, cannot sleep, need to descend, since these are the phrases that matter most if something goes wrong at altitude. A simple translation app on your phone works reasonably well in teahouses lower down the valley where there is occasional signal, but do not rely on it above Samagaon where connectivity disappears for days. Guides are used to working with clients across a wide range of English levels and are generally patient and good at communicating with gestures, pointing at maps, and simple vocabulary when needed, so language differences rarely become a serious problem on this route, but it helps to arrive with realistic expectations rather than assuming smooth English conversation throughout.
What to Pack Beyond Standard Japanese Hiking Gear
Most Japanese trekkers arrive with excellent base layers, good rain shells, and solid trekking boots already broken in, since Japanese outdoor brands and hiking culture produce genuinely well prepared hikers on the gear front. Where the gap usually shows up is cold weather gear rated for genuinely extreme temperatures, since nights above 4000 meters on this route regularly drop well below freezing, colder than most Japanese mountain huts ever get, since Japanese mountain huts are typically only used in the warmer months and rarely require gear rated below negative fifteen or twenty degrees Celsius.
A heavyweight down jacket and a sleeping bag rated for genuinely cold conditions are essential for the upper part of this trek, and this is one area where Manaslu Treks and Expedition removes a real logistical headache for Japanese trekkers specifically: every client on our Manaslu Circuit Trek package is provided with a sleeping bag and a down jacket as a standard part of the trip, for use throughout the trek and returned at the end. That means you do not need to buy or carry extreme cold weather gear all the way from Japan just for a single trek, which matters given airline baggage limits and the fact that heavyweight down gear takes up significant pack space you would rather use for other things.
Beyond that, bring good sunglasses rated for glacier and snow glare, a headlamp with spare batteries since some teahouses above Samagaon have limited electricity, water purification tablets or a filter as a backup to boiled water, and a basic personal medical kit including any altitude medication your doctor has prescribed. Trekking poles are worth bringing from Japan if you already have a set you trust, since the descent sections, particularly after crossing the Larke La, are steep and long. Local currency in small denominations for tips and incidentals is also worth sorting out before you leave the road head, since change can be hard to find in the smallest villages.
Cultural Adjustment, Rural Nepal Teahouses Versus Japanese Mountain Huts
Japanese mountain huts, even basic ones, tend to be efficiently run, orderly, and generally clean by international standards, with predictable meal times and a fairly standardized experience from hut to hut. Nepali teahouses in the Manaslu region are a genuinely different kind of accommodation. Rooms are simple, usually just a bed and maybe a small table, walls are thin, and shared bathrooms are the norm, sometimes with squat toilets rather than western style ones the higher you go. Hot showers, where available at all, often cost extra and may just be a bucket of heated water rather than a proper shower.
The pace of teahouse life is also slower and less structured than Japanese hut culture. Meals take longer to arrive since everything is cooked to order on a single stove serving the whole dining room, and menus are limited the higher up the valley you go, generally built around dal bhat, noodle soups, and simple fried dishes, since fresh ingredients become harder to source the further you are from a road. This is not a failure of standards, it reflects the genuine remoteness of the Manaslu region, where everything not grown locally has to be carried in on someone’s back or by mule train.
What I tell Japanese clients is to treat this as part of the experience rather than a deficiency compared to a Japanese hut. The warmth of the welcome in these teahouses, the wood stove in the dining room in the evening, and the direct contact with Gurung and Tibetan Buddhist culture in villages like Samagaon and Lho are genuinely part of what makes this trek worthwhile, and they simply are not comparable to a night in a modern Japanese alpine hut. Patience with slower service, flexible expectations around cleanliness standards, and an open mind about food repetition go a long way toward enjoying rather than enduring this part of the trip.
Visa and Cost Overview
Here is a straightforward summary table covering the main upfront costs a Japanese trekker should plan for, in addition to the trek package itself.
| Item | Typical Cost | Notes |
|---|---|---|
| Nepal visa on arrival, 15 days | 30 US dollars | Multiple entry, cash or eVisa card payment |
| Nepal visa on arrival, 30 days | 50 US dollars | Recommended length for most Manaslu itineraries |
| Nepal visa on arrival, 90 days | 125 US dollars | Useful if combining with extended travel in the region |
| Restricted Area Permit, peak season (Sep to Nov) | Around 100 US dollars for first 7 days, plus per day fee after | Must be arranged through a licensed agency |
| Restricted Area Permit, off season | Lower base rate than peak season | Still agency arranged only |
| Manaslu Conservation Area Permit | Around 3000 Nepali rupees | Foreign national rate |
| Annapurna Conservation Area Permit | Around 3000 Nepali rupees | Required since the route crosses into Annapurna Conservation Area near the pass |
| International flight, Tokyo or Osaka to Kathmandu | Varies by season and airline | Direct option around 7 hours 45 minutes via Nepal Airlines, connecting options 9 to 14 hours total |
| High altitude travel insurance | Varies by provider | Confirm coverage above 5000 meters and helicopter evacuation specifically |
A Sample Two Week Itinerary and Packing Table
Every itinerary should be adjusted with your guide based on conditions, but here is a representative outline of how a typical fourteen to sixteen day Manaslu Circuit itinerary is structured, including the acclimatization days that matter so much for trekkers whose highest previous experience is in the Japanese Alps.
| Day | Route Segment | Approximate Altitude |
|---|---|---|
| 1 | Kathmandu arrival, rest and preparation | 1400 meters |
| 2 | Drive from Kathmandu to Soti Khola or Machha Khola | 700 to 900 meters |
| 3 to 4 | Trek up the Budhi Gandaki valley through Jagat and Deng | 1400 to 1800 meters |
| 5 to 6 | Continue to Namrung and Lho, entering Manaslu Conservation Area | 2200 to 3200 meters |
| 7 | Trek to Samagaon | 3500 meters |
| 8 | Acclimatization day at Samagaon, optional side hike | 3500 to 4000 meters |
| 9 | Trek to Samdo | 3860 meters |
| 10 | Trek to Dharamsala or Larke Phedi | 4460 meters |
| 11 | Cross Larke La pass, descend to Bimthang | Pass at approximately 5106 meters, descend to 3720 meters |
| 12 to 13 | Descend through Dharapani area toward road head | 1900 to 1100 meters |
| 14 | Drive back to Kathmandu | 1400 meters |
On the packing side, prioritize a broken in pair of trekking boots, moisture wicking base layers, a warm mid layer fleece, waterproof shell jacket and pants, sun hat and glacier rated sunglasses, headlamp, water purification method, basic first aid and any altitude medication, and trekking poles. As noted earlier, the heavyweight down jacket and cold rated sleeping bag are provided as part of the standard Manaslu Treks and Expedition package, so those two bulky, expensive items do not need to be sourced or carried from Japan.
For the fine print on permits themselves, our breakdown of the Manaslu permit process and costs goes into more detail than we can cover here.
Frequently Asked Questions
How much does a Nepal visa cost for Japanese passport holders?
Nepal visa on arrival for Japanese citizens costs 30 US dollars for fifteen days, 50 US dollars for thirty days, and 125 US dollars for ninety days, all multiple entry. Most Manaslu trekkers should book the thirty day option given typical trip length including Kathmandu days before and after the trek itself.
How long is the flight from Japan to Kathmandu?
The fastest option is the nonstop Nepal Airlines flight from Tokyo Narita, which takes around seven hours and forty five minutes. If that flight does not suit your dates, connecting routes through Bangkok, Kuala Lumpur, Delhi, or a Chinese hub typically add up to a total travel time of nine to fourteen hours depending on the layover.
Does hiking experience in Japan actually help on the Manaslu Circuit?
Yes for fitness and gear familiarity, but altitude is the real challenge and Japan simply has no mountains that reach the elevations you sleep and walk through on this trek. Treat your Japanese hiking background as a fitness advantage, not as altitude preparation, and follow the acclimatization schedule closely regardless of how strong you feel.
Will my Japanese travel insurance cover a Himalayan trek above 5000 meters?
Often not. Many standard Japanese travel policies, including credit card bundled coverage, exclude high altitude trekking or cap emergency and rescue coverage at an altitude well below the Larke La pass. Confirm directly with your insurer that trekking above 5000 meters and helicopter evacuation are both explicitly covered before you commit to dates.
What is the best time of year to book this trek from Japan?
Autumn, especially October, and spring, especially April, offer the most stable weather and clearest views. Book flights and permits at least two to three months ahead if targeting the busiest weeks of the autumn season, since seats and permits both tighten up closer to peak dates.
What permits do I need and can I trek Manaslu solo?
You need a Restricted Area Permit, a Manaslu Conservation Area Permit, and an Annapurna Conservation Area Permit, all arranged through a licensed trekking agency, and a licensed guide is mandatory throughout the restricted section. As of March 2026 the old minimum group size of two trekkers was removed, so a genuinely solo trekker can now apply individually as long as a licensed guide is arranged.
Can I use Japanese yen directly in Nepal or on the trail?
Not really. Yen can sometimes be exchanged in Kathmandu at a mediocre rate, but the practical approach is to carry US dollars or exchange for Nepali rupees on arrival. Once you leave the road head there are no ATMs at all, so carry enough rupee cash to cover the full trekking portion of your trip.
Will there be a language barrier with my guide?
Licensed guides generally speak workable English, and communication on the trail is rarely a major problem, though fluency levels vary. Japanese speaking guides exist but are uncommon, so if that matters to you, ask about availability well ahead of your trip rather than assuming it can be arranged last minute.
What should I pack that is different from my usual Japan hiking gear?
Bring gear rated for genuinely cold nights above negative fifteen degrees Celsius, glacier rated sunglasses, and a reliable headlamp, since these are more extreme conditions than most Japanese mountain huts require. Manaslu Treks and Expedition provides a sleeping bag and a down jacket as standard for every trekker on this route, which removes the need to source or carry that specific bulky, expensive gear from Japan.
Are rural Nepal teahouses similar to Japanese mountain huts?
Not really. Teahouses are simpler, slower paced, and offer more limited menus and bathroom facilities the higher you climb, reflecting the genuine remoteness of the Manaslu region rather than any lack of effort. Most Japanese trekkers adjust within a few days once they stop comparing the experience directly to Japanese hut standards and start appreciating it on its own terms.
If you are planning a Manaslu Circuit Trek from Japan and want help working through visas, flights, permits, and the acclimatization schedule that actually fits your dates, get in touch with Manaslu Treks and Expedition directly. Call or message us on WhatsApp at +977 9869225929, email info@manaslutreks.com, or reach out through our contact details, and we will help you build a trip that respects both your hiking strength and the altitude you are about to meet for the first time.